Submitting an expense
Submitting expenses is an elemental part of Travel and Expense management. It allows for easy record keeping of expenses of all types, and can save you the headache of keeping track of all your receipts by simply attaching a picture of them and noting their content the moment you receive them.
Initiating the process
You can start the process of submitting an expense in four different ways:
- Click the credit card icon in the bottom menu to start creating an expense from scratch.
- Click the camera icon in the bottom menu to start the process by taking a photo of a receipt.
- Share a photo from your photo gallery and select the Travel & Expense Management app icon. If you share multiple photos you will be presented with these options: Create one expense with all photos, or create one expense per photo.
- Touch and hold on the app icon on the home screen and you can choose the following: New mileage, New photo or New expense. You can even create shortcuts to these options by dragging them onto the home screen.
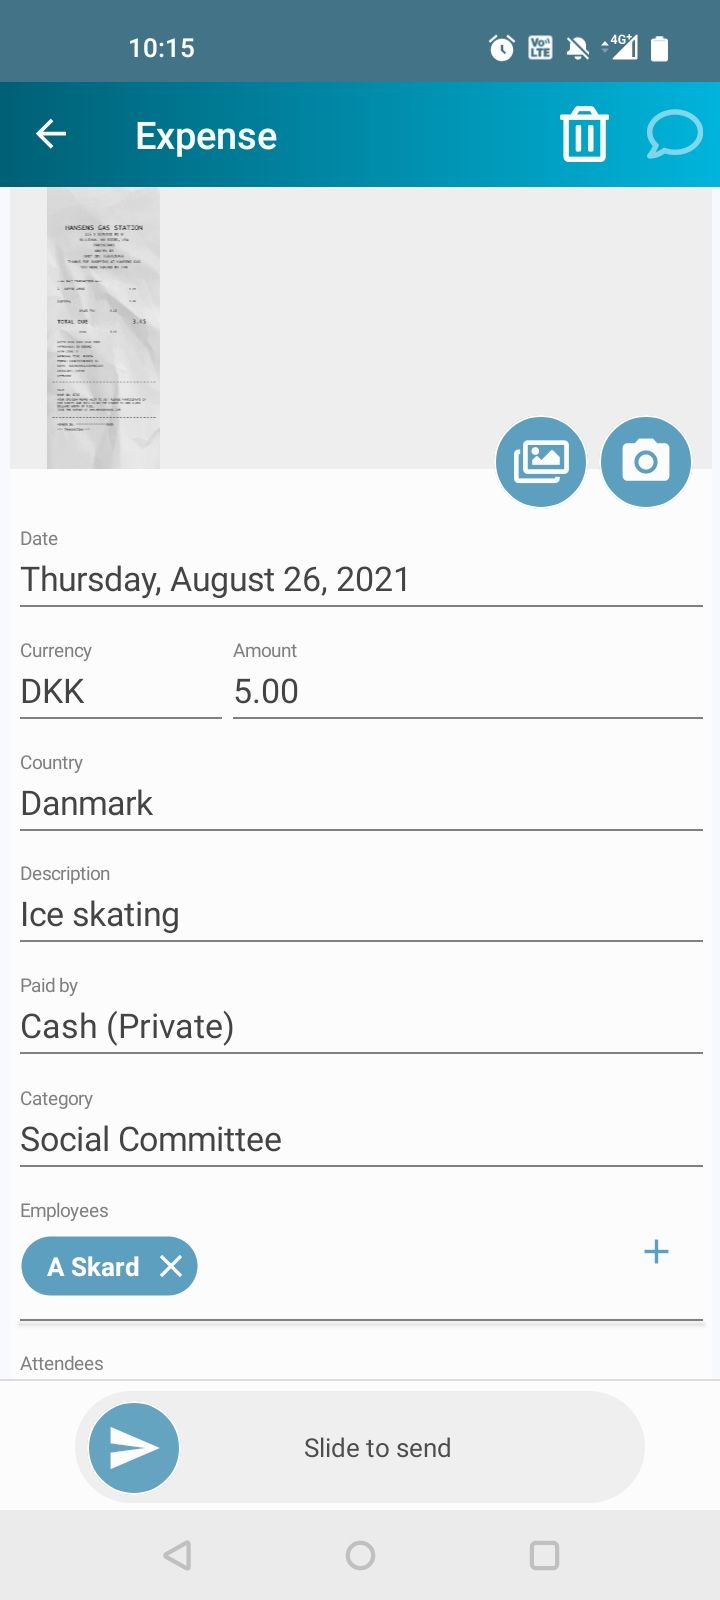
After initiating an expense report, for example by taking a photo, you will be presented with the following view:

At the top you can choose to return to the dashboard. If you have added any information or photos, the expense will be saved as a not sent expense.
If you wish to discard an expense, press the Delete button at the top.
Photos
Photos are an important tool on Travel and Expense Management, as they allow you to discard your receipts immediately after receiving them and taking a picture. Below you will find some of the prominent expense photo details.
Photo thumbnails: At the top, the current photos, if any, are displayed as thumbnails.
Photo preview: Tapping a photo will open a preview. Here you can Delete or Rotate it. In the bottom you can choose which photo to preview.
Preview of your photo Options for camera 
 )
)Photos: Allows you to choose a photo from a gallery on your device. You must give the app permission to access the photos, media, and files on your device.

- Take photo: Enables you to take a photo.

You can see which options you have when using the camera in the above image:
- Flash icon: Enable or disable the flash on your device.
- Camera icon: Take a photo.
Expense details
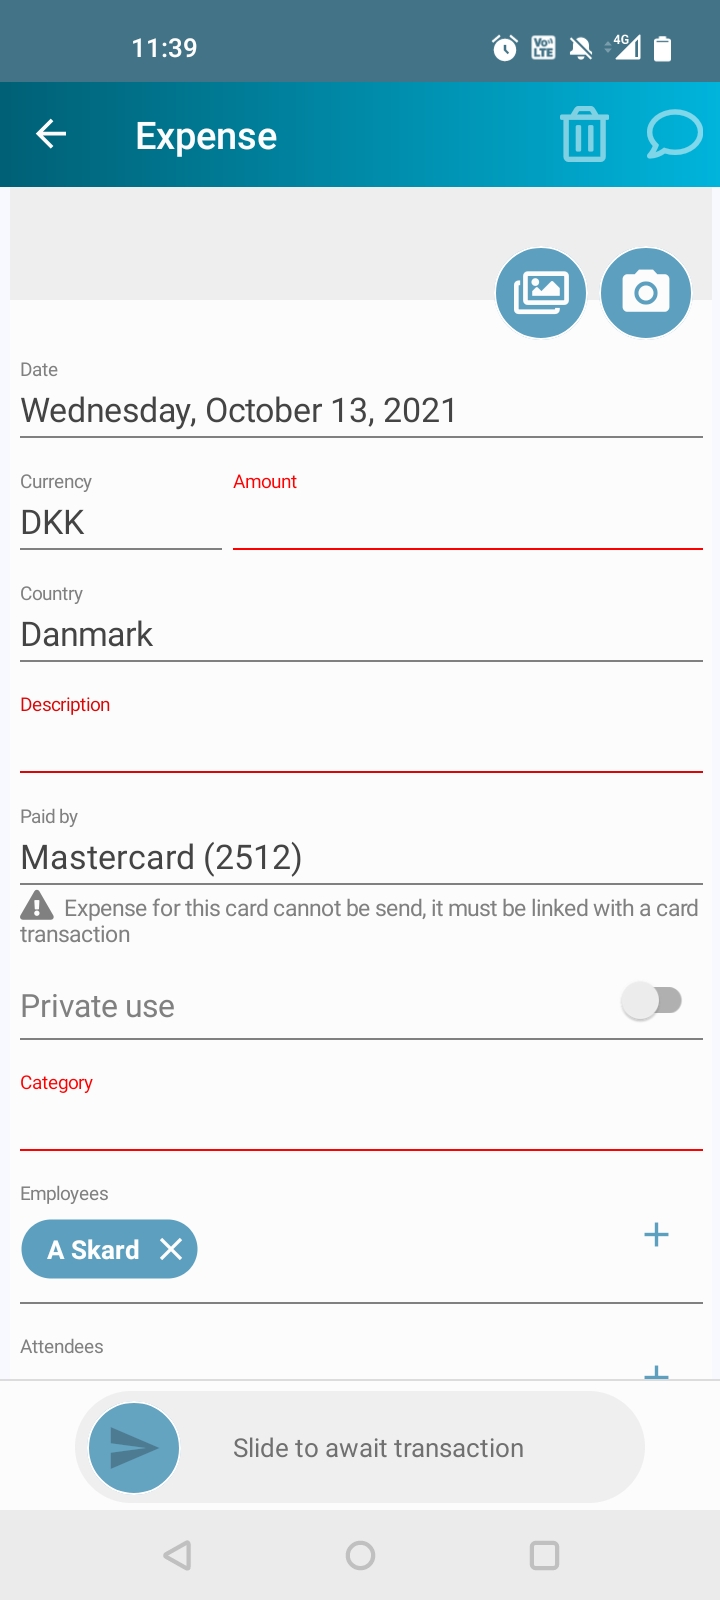
Below you can find a description of what each term in an expense report refers to. In the app, the items colored red are the ones mandatory.

- Date: Change the date of the expense. If you have attached a photo, then the date will be the day you took the photo. Todays date will be used if you take a photo with the app.
- Currency: Select the correct currency from a list. Initial currency is based on the GPS location of the device.
- Amount: Enter the total amount of the expense.
- Country: Select the country from a list. Initial country is based on the current GPS location of the device.
- Description: The description will be the title for the expense.
- Paid: Here you can choose between Private, Company card or Allowance.
- Category: Select a category out of the ones provided by your company.
- Employees: Add or remove employees. Your name is added by default.
- Attendees: Add or remove attendees such as customers or guests.
- Job: Type a job. This is primarily used by consultancy firms. When you have entered a job, the Job description will display additional information.
- Task: Type a task. This is primarily used by consultancy firms. When you have entered a task, the Task description will display additional information.
- Comment: Enter a comment concerning the expense. If your expense has been rejected you can enter a comment here in response to the comment made by the approver.
- Additional info: Enter any additional information.
- Slide to send: Use this slider to send the expense for approval.
- Discussion: The speech bubble icon in the top right corner will show any comments made by you and the approver. This is only relevant if the expense has been rejected.
To further your understanding of how to efficiently order your expenses, proceed to the 'Matching an expense and a transaction' section.
If you want to learn how to submit mileages, you can go to the mileage section.
