Submitting an expense through the web portal
Submitting expenses is an elemental part of Travel and Expense management. It allows for easy record keeping of expenses of all types, and can save you the headache of keeping track of all your receipts by simply attaching a picture of them and noting their content the moment you receive them.
Though expense submission is suggested to be done via the app, it can be done through the web portal as well, with mostly the same ease.
You start the process of submitting an expense by clicking the New Expense menu item, which will bring up the following view:
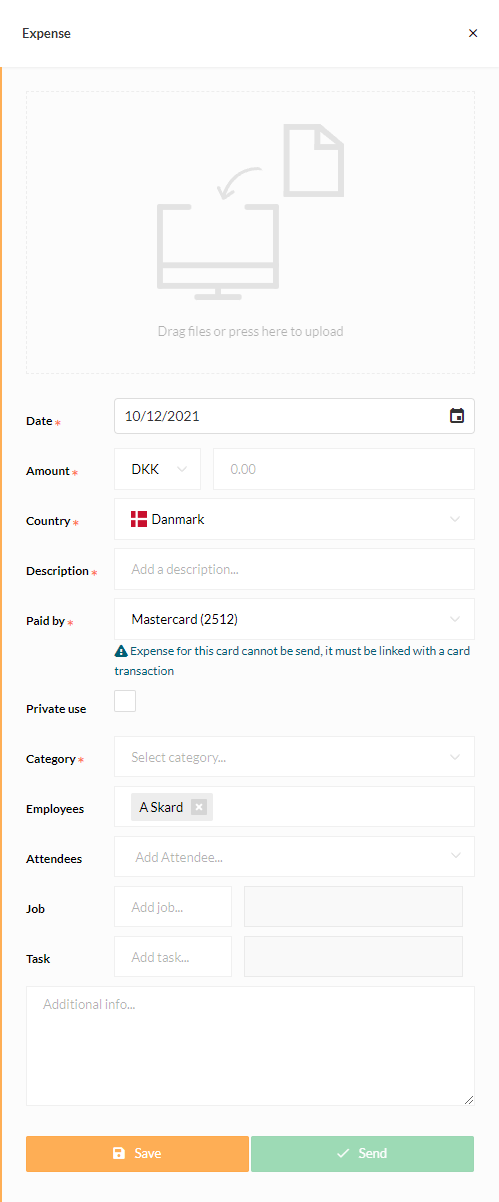
- Click in the top area to attach any relevant files or photos such as a picture of a receipt, or just drag them onto the area. Supported file types are PDF and most common image types.
- Select a Date. Today's date is set by default.
- Enter an Amount and change the Currency if needed.
- If needed, change the Country for the expense. This defaults to your country setting in Business Central.
- Enter a Description. This will be the title for the expense.
- In the Paid by field you can choose between Private, Company Card or Allowance.
- Choose a Category for the expense between the ones provided by your company.
- Either Save the expense and send later, or Send immediately.
These are optional fields when creating an expense, depending on your company policies.
- Employees: Add or remove employees. Your name is added by default.
- Attendees: Add or remove attendees. Examples include guests or customers.
- Job: Type a job. This is primarily used for consultancy firms.
- Task: Type a task. This is primarily used for consultancy firms.
- Additional info: Enter any additional information that may be relevant.
