Travel and Expense Management app interface
This section documents the different relevant elements in the Travel and Expense Management app.
Home screen notification
You can have additional practicality by dragging the icon onto your home screen.
![]()
If the Travel & Expense Management icon on the home screen shows an indicator, this is to indicate have unsent expenses or mileages.
Dashboard
The dashboard is the foremost page of the app, and the one you will go directly to when opening it, provided you are logged in.
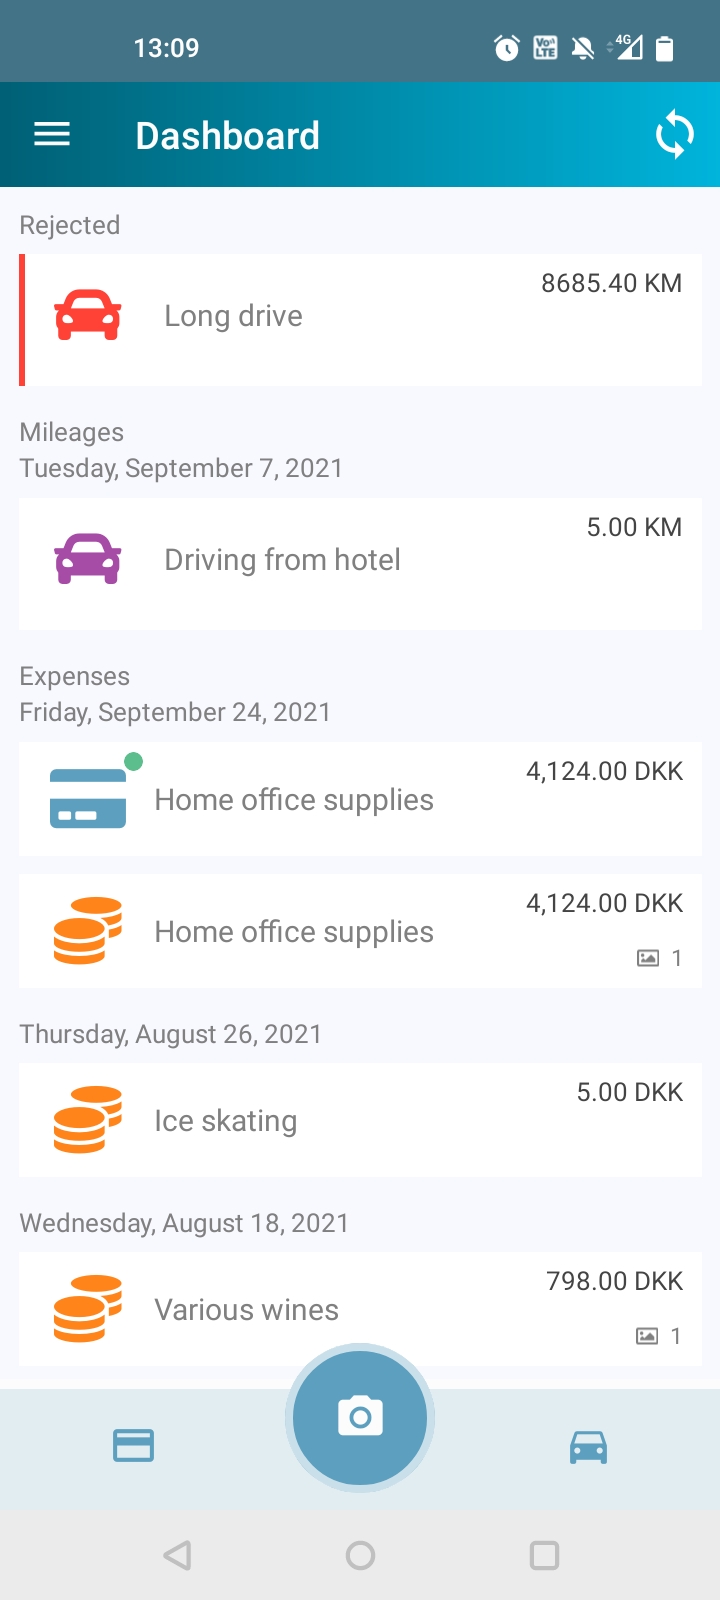
In the top is a refresh icon that will indicate if you should synchronize with the cloud. This will happen if it has been a while since you last synchronized, or you have entries waiting to synchronize.
Synchronizing the data with the cloud can be done at any time, and can be achieved by:
- Tapping the refresh icon in the top right.
- Dragging down from the top of the dashboard.
The next part of the Dashboard is a list of Mileages, Expenses and Credit card transactions.
If you have any rejected expenses or mileages then theses will be listed at the top with a red color.
The Expenses list will display your expenses that are not sent yet. Each item will show a title (if any) - taken from the description details, an amount with corresponding currency, and an indicator showing the number of attached photos.
The Mileages list will display your mileages that are not sent yet. Each item will show a title (if any) - taken from the description details, a distance, and the starting and destination address.
The Credit card transactions are credit card transactions made with your employee credit card. Each item will show a title, taken from the transaction details, and an amount with corresponding currency.
A red synchronization indicator will appear on expenses that have not been synchronized with the server.
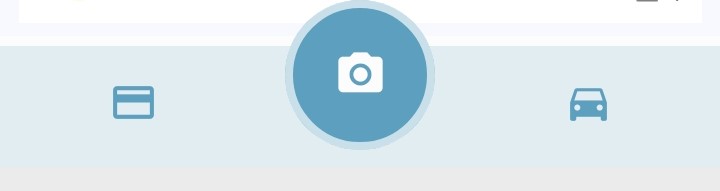
Bottom menu
At the bottom of the screen you can start creating a new Expense from scratch by clicking the credit card icon.
Clicking the Camera icon will immediately enable you to take a photo of an expense receipt.
Finally, clicking the car icon will open the Mileage reporting tool.
Menu
The Menu, accessed in the top left corner, gives you the following options:
- Sign out: Enables you to sign out.
- Dashboard: Jump to the Dashboard.
- Vehicles: Show the vehicle list. Add or edit vehicles by entering a Name and a Registration No..
- History: Will display all mileages and expenses you have previously submitted.
- Use document scanner: This option is only available on iOS 13+. Enabling this option will allow the camera to use the Document Scanner to capture one or more documents. Read more about the feature here. This will also move the Photos option to the front of an expense (now a button).
